
Introduction
I wanted to add some features to my blog lately—GitHub login, Cloudflare ecosystem, SEO optimization, you name it. Problem is, I didn’t have a domain name. Every time I tried to set something up, it just… failed because of that. So I figured, why not just buy one? It’s not that expensive—maybe a few dozen bucks a year. I’ve done this before anyway, just never paid for it myself.
Why Choose Cloudflare for Domain Registration?
Cloudflare Registrar stands out because they don’t markup prices. Unlike traditional registrars that profit from domain sales, Cloudflare uses domains as a gateway to their ecosystem.
- True wholesale pricing: Cloudflare promises to sell domains at cost forever. Every penny you pay goes directly to the registry—no hidden fees, and renewal prices stay the same. No “cheap first year, expensive second year” tricks.
- Free privacy protection: WHOIS privacy protection comes standard, hiding your name, email, and address. Other registrars often charge extra for this.
- Top-tier security: Free enterprise-grade DNSSEC to prevent domain hijacking, plus hardware key support (like YubiKey) for login. Maximum security.
- All-in-one management: If you’re deploying on Cloudflare anyway, buying your domain here saves you the DNS wait time. Certificate requests and DNS resolution happen automatically.
Here’s a quick comparison:
| Aspect | Cloudflare | Traditional Registrars (Aliyun/Tencent/Namecheap) |
|---|---|---|
| Pricing | Cost price, no markup | Market price, cheap first year, expensive renewal |
| Privacy | Free by default | Free or extra cost |
| Experience | Developer-friendly, high integration | Feature-spread, more config needed |
| ICP License | Not supported (China MIIT) | Supported (China MIIT) |
One downside: Cloudflare doesn’t support China MIIT ICP filing. Whether you need that depends on your situation. For me, it’s not really necessary—my hosting is on Cloudflare, the only real cost is the domain, and Cloudflare’s CDN works fine in China. If I ever need ICP filing later, I’d need to get a Chinese server and a Chinese domain.
So if you’re not planning to file in China and you’re using Cloudflare’s ecosystem, Cloudflare is the endpoint for domains.
Prerequisites
- Cloudflare account
- Visa card or PayPal
If you don’t have a Cloudflare account yet, just sign up with your Google or GitHub account.
Payment Prep (ICBC Student Card Example)
For international payments like Visa or PayPal, it can be tricky if you’re in China. If you can’t find someone to help you pay, you’ll need your own solution. Many banks offer Visa cards for students—here’s an example with ICBC’s Star Sign Card (this is just to help fellow students, not an ad).
Application requirements: Undergraduate or above, try to keep student cards under 2-3, online loans (Huabei, Baitiao, etc.) under 2 accounts.
Card features:
- UnionPay (CNY) + Visa (foreign currency) combo card, regular card, free annual fee.
- Campus version has 0 credit limit in most regions! Non-campus version requires work/internship proof.
- 11 currency accounts—doesn’t affect credit score.
Application steps:
- Open ICBC app, search “星座卡学生办” (Star Sign Student)
- Select 宇宙星座卡校园版 (VISA + UnionPay)
- Fill in your info and mailing address
- Once you get the card, activate it at a nearby branch
Note: Don’t apply in a different city from where you registered. If your bank is in your hometown but you’re studying in another province, you might not be able to activate it. Pick a convenient location.
Converting to USD:
- Open ICBC app, search “美元兑换”
- Select 结售汇 → 购汇
- Buy USD as needed
- Check your card’s USD balance after getting the SMS
Don’t just have exactly enough USD for your domain—some international sites have minimum payment amounts. Worth getting a Visa card anyway, you’ll use it eventually.
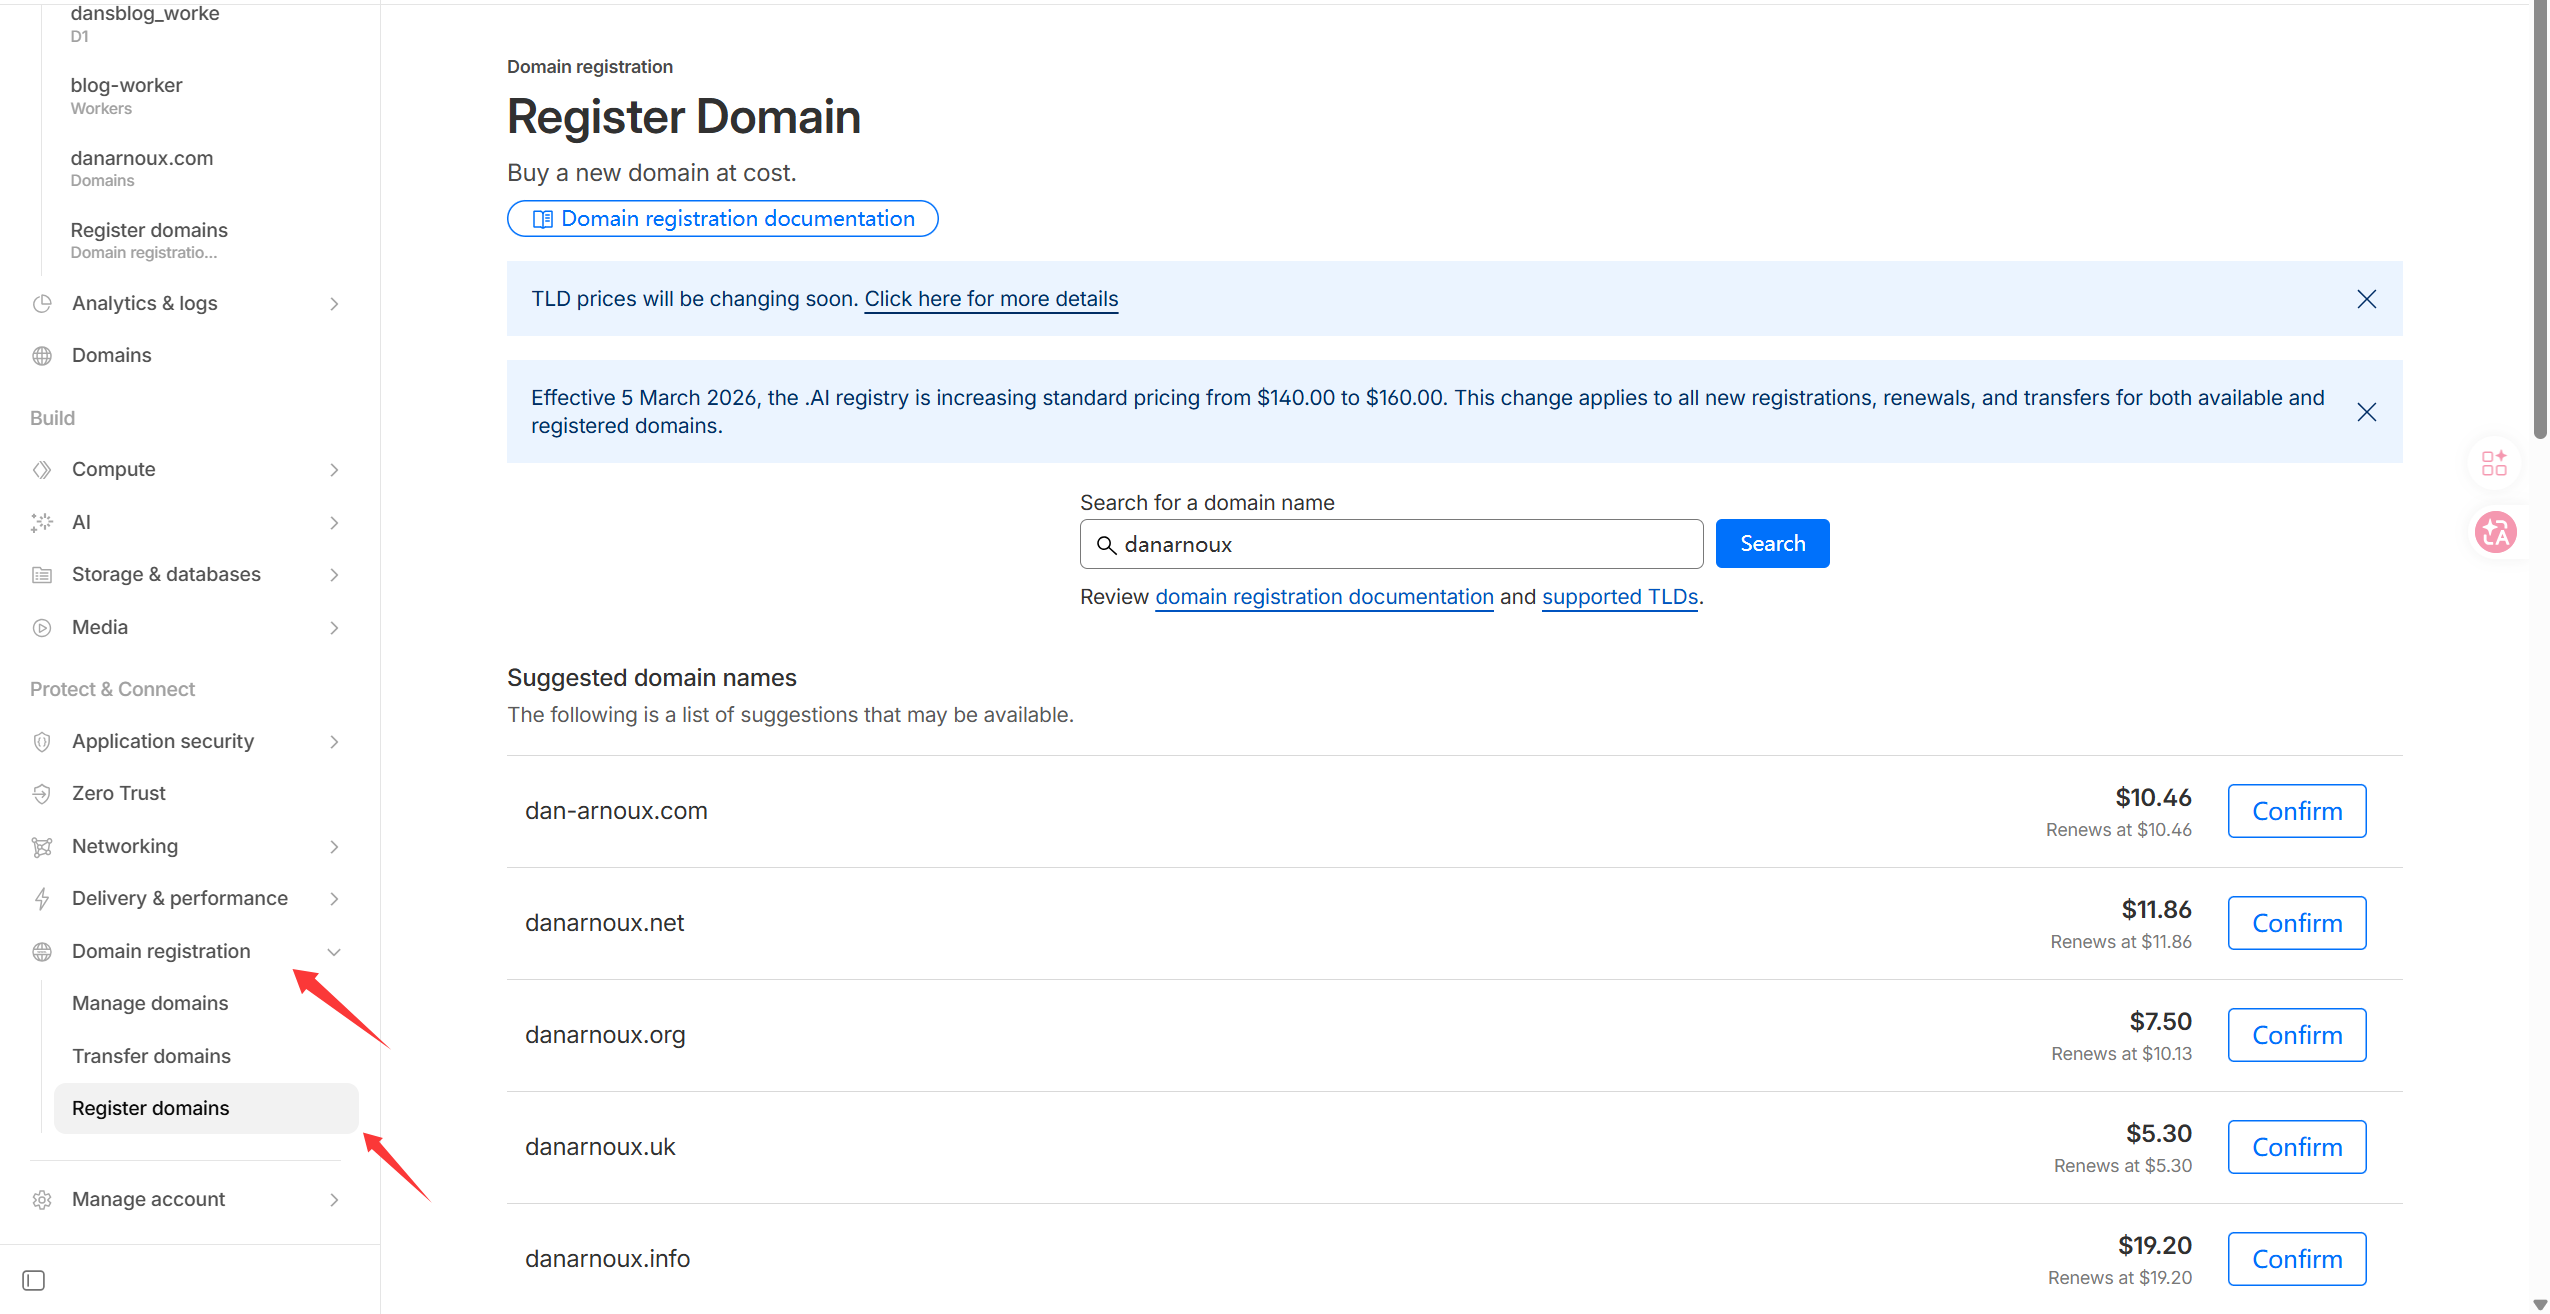
Cloudflare Domain Registration Steps
Go to https://www.cloudflare.com/products/registrar/ to learn about Cloudflare’s domain registration. You can also find it by searching “Cloudflare domain purchase” or go directly to https://dash.cloudflare.com/domains.
Search for your desired domain. Let’s use danarnoux as example—you’ll see many TLD options.
Here’s a quick reference for common TLDs:
| TLD | Type | Best For | Notes |
|---|---|---|---|
| .com | Generic | Top choice. Blogs, brands | Highest recognition, good for SEO. |
| .net | Generic | Tech blogs, network services | Professional, good .com backup. |
| .org | Non-profit | Open source, communities | Trustworthy, great for non-profit tech communities. |
| .io | Tech | Tech blogs, dev tools | Super popular among programmers. |
| .me | Personal | Resumes, portfolios | Perfect for personal branding. |
| .info | Info | Knowledge bases, docs | Usually cheaper, good for info sites. |
| .dev | Developer | Tutorials, code repos | Google-owned, forced HTTPS, very recognizable. |
You might notice .uk is much cheaper than .com. My advice? Don’t chase the cheap price.
.uk is the United Kingdom’s country code TLD, managed by Nominet (like .cn for China or .us for the US). You can buy it, but there’s a UK address requirement. Without a UK address, many registrars (including Cloudflare) might reject your registration or require proxy services. If you provide a fake UK address, the domain could get suspended during random audits.
Just pick what you want. Remember to check availability and renewal prices.
Buying the Domain
-
Select your domain and click Confirm
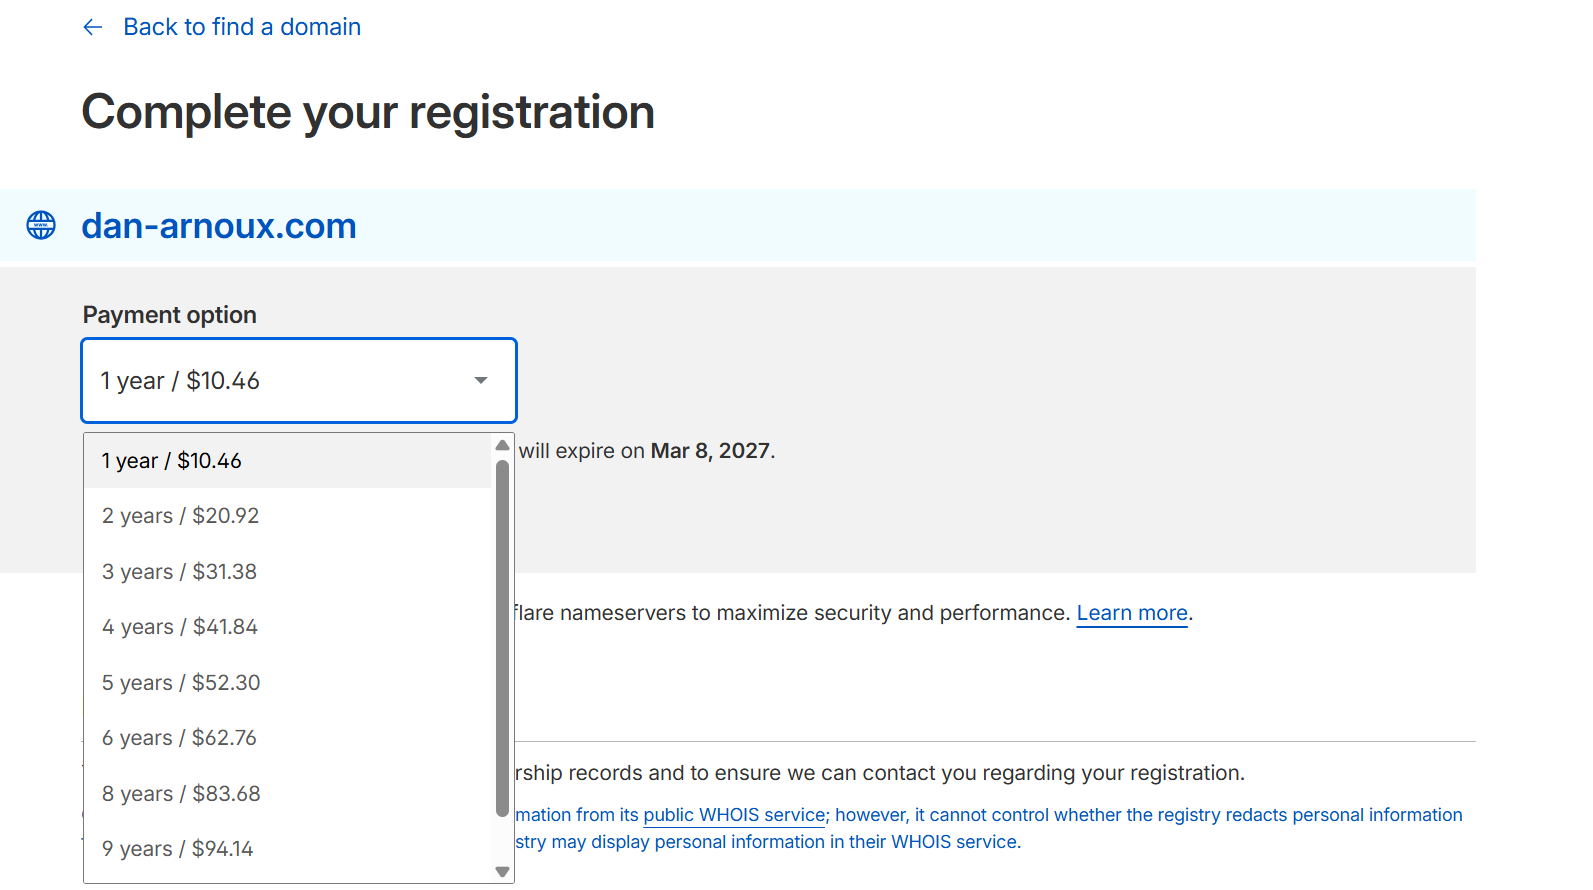
-
Choose your billing period (years). Decide whether to enable Automatic renewal
-
Fill in your details and invoice info
-
When paying with card, be careful with the security code—three wrong attempts locks your card. You’ll need to report it lost and get a new one.
-
If your card gets declined, check your USD balance, verify the security code and card number. Contact your bank if needed. One issue I ran into: payment gateway rejected me because of location/IP mismatch. I stopped using Hong Kong nodes and it worked. Try it if you have similar issues—just might be slower.
-
Check your email for the invoice and card balance.
-
Go to Domains in the sidebar to confirm your purchased domain is there.
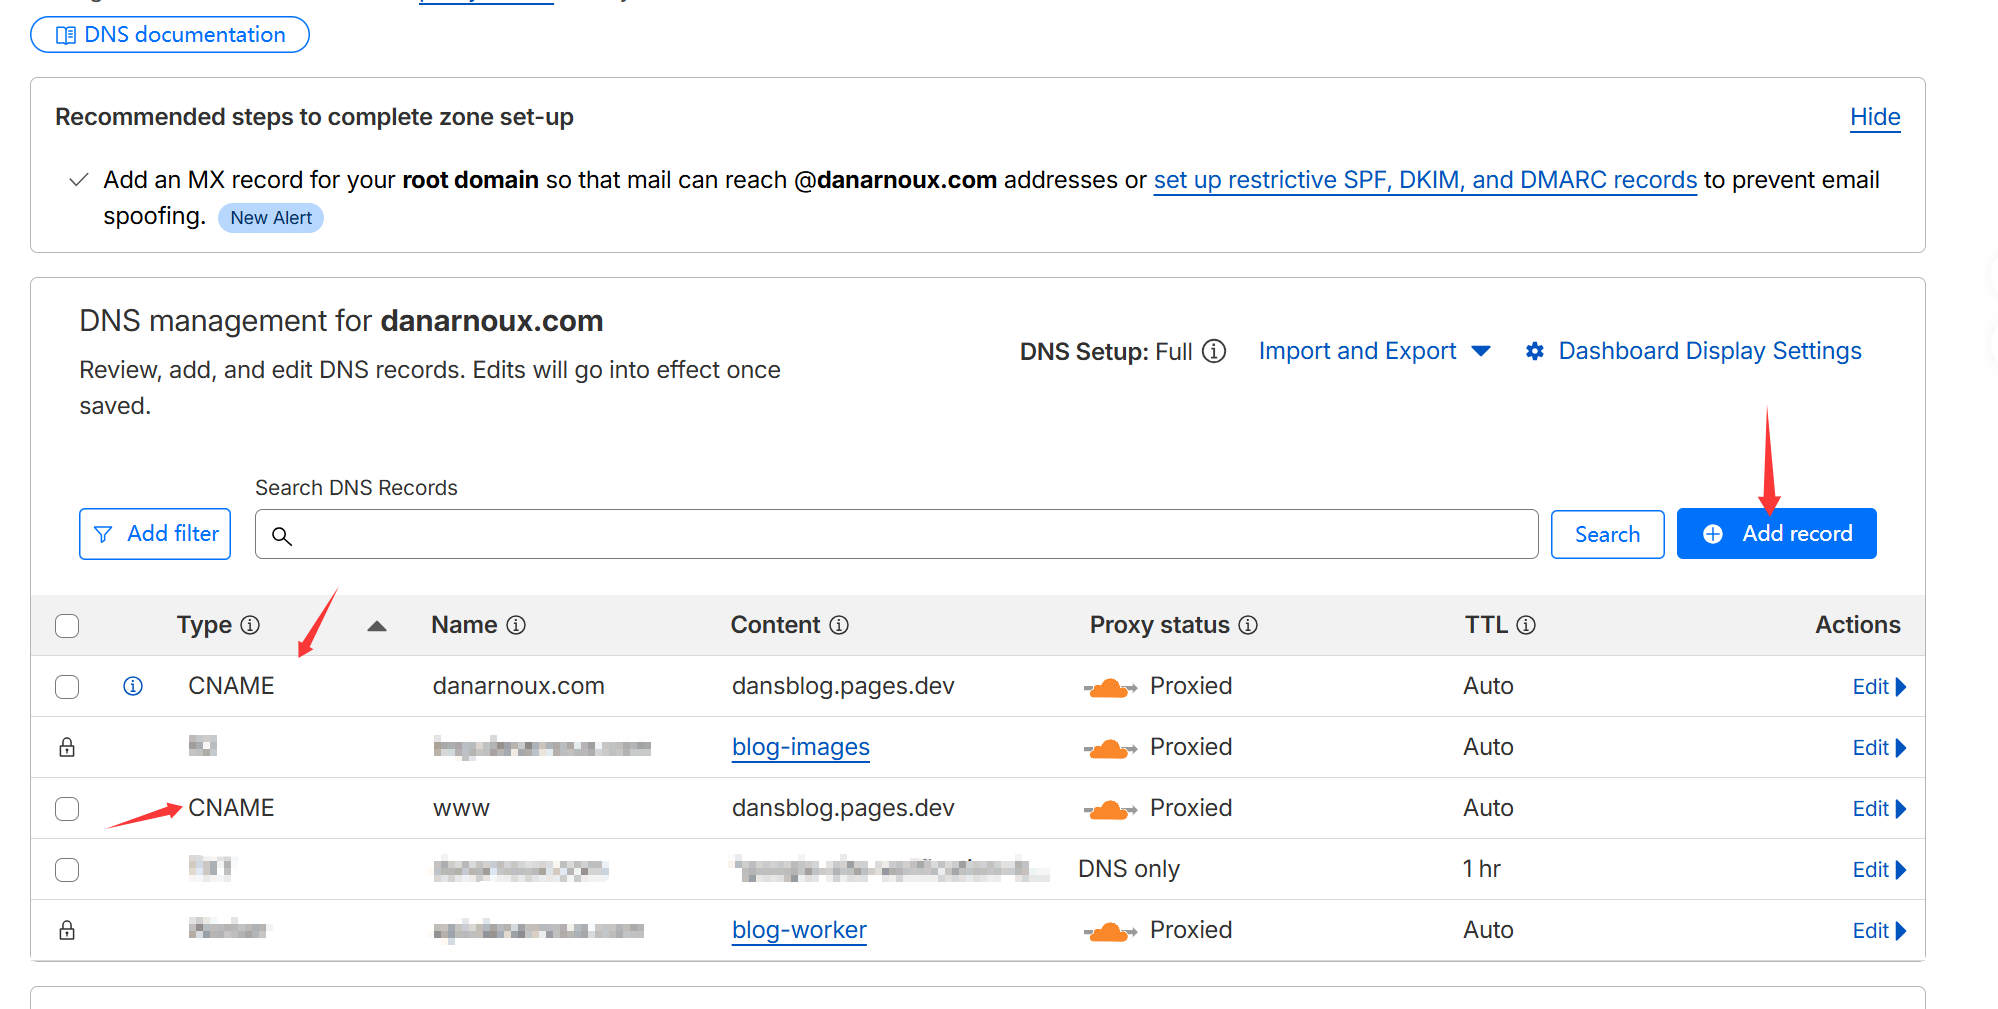
DNS Settings
Click Domains in the sidebar, then the three dots to configure DNS.

You can follow my setup—use CNAME for analysis. The redacted parts aren’t important. Cloudflare Proxy (the orange cloud) should be enabled by default for better speed and security. Don’t forget to save.

Wrapping Up
I won’t go into SSL/TLS details here—Cloudflare sets up a universal certificate by default. I’ll cover more in future posts, like how to do SEO right and GitHub OAuth. Stay tuned!
Comments
Login with GitHub to comment